Wish Upon A Dish: 2017

March 24, 2017

Butternut Squash Cannelloni with a Sage Walnut Sauce ♥ Pasta for Two


Every Fall my local small chain Italian restaurant puts my favorite pasta dinner back on the menu.
What I thought was butternut squash stuffed large tortellini (called tortilacci) actually turned out to be pasta stuffed with a basic cheese mixture who's sauce was butter & spiced roasted cubes of butternut squash. Still very good but in the back of my mind I made a mental note to make homemade squash stuffed pasta.

While checking out my daily Pinterest recommendations, I spotted a pin for Butternut Squash Cannelloni with Walnut Sage Cream Sauce from Martha. I immediately pinned it.
I just had to make this yesterday.

Before I cook a recipe, I checkout the ingredients and then I hit the reviews. If the reviews are not favorable but just nit-picky and I could adjust easily, it goes on my menu & the shopping list.
I usually don't print the recipe until right before I start the cooking process because I learned the hard way when it took me a full week to file less than half.  

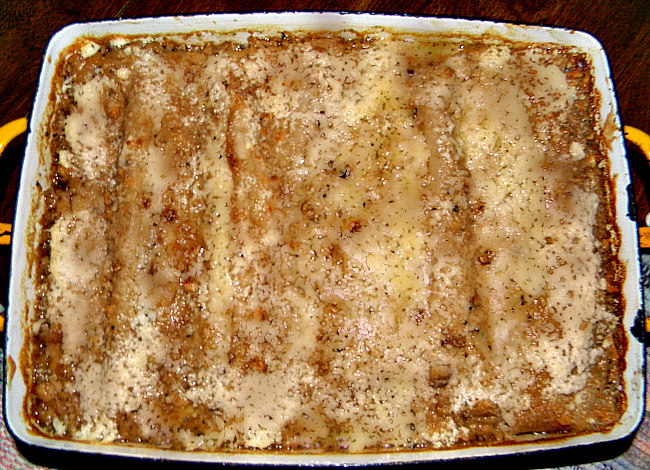
Two things I did change. I added Parmesan to the top right before baking and hit the broil for some crunch.
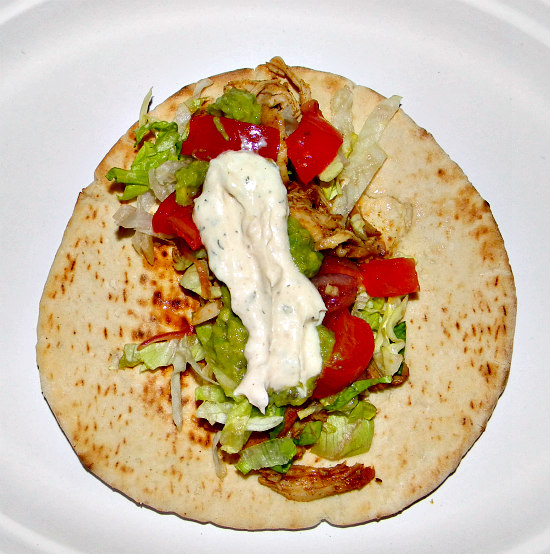
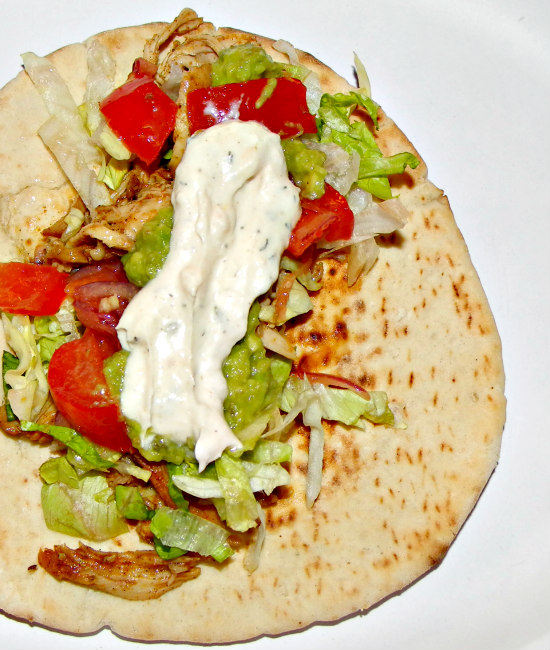
While the Nudge would never pick this in a restaurant, he has become more tolerant of my vegetable main meals. Heck, when he has lunch out, he's been known to order the avocado eggrolls!

This was a thumbs up! Very rich and filling. Would I make it again. Yes, most certainly but the next time I would save a few steps and use the filling for jumbo shells.
Yum!!!👍👍💗

Butternut Squash Cannelloni
makes 6 cannelloni

* 3 tablespoons unsalted butter
* 1 small onion, chopped
* 1 to 1/2 pound butternut squash meat, 1" pieces
* 1 teaspoon ground cinnamon
* 1/8 teaspoon ground nutmeg
* 1/8 teaspoon cayenne pepper
* 1/2 teaspoon cumin
* 1 tablespoon Kosher salt
* 1/2 teaspoon freshly ground pepper
* 1/2cup grated Parmesan cheese
* 1/2 cup ricotta cheese
* 2 cups chopped spinach, chard or other greens
* 2 tablespoons EVOO
* 6 sheets no-boil lasagna sheets
* 1 teaspoon dried sage

1. Heat 2 tablespoon butter in a large non-stick skillet over medium high heat.
Add onion & squash and saute for 5 minutes, flip over and repeat 2x more.
2. Add 1/2 cup water, a lid and steam for 3 minutes or until squash is soft. Remove the lid and continue simmering until the water is almost gone.
3. Sprinkle spices (up to pepper) over squash and mash mixture. Transfer to a bowl. When cool, stir in ricotta and Parmesan.
4. Add remaining tablespoon butter to a saute pan and cook greens until wilted and liquid has evaporated. Season with salt & pepper. Cool and add to cheese mixture. Refrigerate until ready to use.
5. Heat water to a boil & add a tablespoon of salt. Cook pasta for 6 minutes, drain and lay the pasta on a cookie sheet that has been drizzled with olive oil.
6. To assemble the cannelloni: Lay a pasta sheet on a wooden board. Spoon three tablespoons of cheese mixture down the middle, lengthwise <---------------->. Add 1/6th of the greens mixture over the cheese and fold the top part of the pasta towards you, pat down to adhere and roll again, seam side down.
7. Spoon half the sauce into a 9x13" casserole pan. Lay the rolled cannelloni seam side down, side by side. Spoon remaining sauce over cannelloni and bake immediately in preheated 425° oven or cover and refrigerate.
8. Right before baking, sprinkle additional Parmesan on top (optional).
8. Bake for 30 minutes until bubbly and browned around the edges.
  
Sage-Walnut Cream Sauce
makes 2 cups

* 2 tablespoons unsalted butter
* 2 tablespoons AP flour
* 1 cup milk
* 1/2 cup heavy cream
* 1/2 cup white wine
* 1 tablespoon ground sage
* Salt & pepper
* 1/4 cup chopped walnuts
* pinch of nutmeg 

1. Heat the butter in a a large saucepan over medium heat. When bubbling, add flour and whisk until all the lumps are gone. Add milk, cream & wine to butter/flour mixture and simmer on low, whisking continuously until mixture is free of lumps. Add walnuts & nutmeg to sauce and salt & pepper to taste.

March 22, 2017

Pantry Pickin' Chicken Shawarma ♥ #RecipeReDux March Challenge


If you are a food blogger, you will most certainly have one recipe (or 20) in your blog post section that has been delegated to the draft pile.

Without even counting and at the top of my head, I can honestly say my drafts are well over 100.
So, once a year I go back in and clean them out, that is, except the few that I still want to blog about but just never get the chance too.

Meet one from 2011.

I have been trying to make shawarma for years. Why now?
A few reasons, one being I have an abundance of pita in my freezer, the other is the acceptance of The Nudge to try new ethnic cuisines that I have always wanted to explore but wouldn't dare put on our menu.

This month's theme was picked with me in mind. We are challenged to cook with three ingredients already in our fridge & pantry.
Besides the chicken thighs, everything in this recipe came right out of my pantry.


If you open my pantry door you would swear that I snapped a pic of my store's spice racks and recreated them in the over-the-door storage rack that leads to my pantry.
I am not kidding.
What better way to take a trip around the world from your diner table?


Last week I printed out well known spice mixtures from around the world and made a whole bunch. You have to figure that there will be no more excuses for all those drafts.

Harissa
Za'atar
Berbere
Adobo
Dukkah
Baharat
Ras el Hanout
Curry
Skhug
Greek
Italian
Asian
BBQ

With all those pre-mixed spice blends, the one I did not make was, yea, you got it.....shawarma.
I can now add it to my list.

What I love about this recipe is the ease and quickness.
When I cook chicken, I always try to leave the bone in and remove the skin myself.
Takes me all of 2 minutes but remember we are a family of two and four thighs are easy work.
If I needed 10-12 thighs I would buy them already prepared.


First thing before I start my day, is to marinade or spice that nights dinner. If I was working I would do it the night before. If this was a liquid marinade I would minus the pan and just put everything into the bag but if I have the room, and it is a dry rub, I prefer to leave the meat flat and side by side.

Then I bag it, suck out as much air as I can and pop it into the bottom drawer.  


By laying them flat and not touching, the spice mixture stays in place and evenly flavors the meat.

While I prepare the salad garnish, I heat the grill and remove the pan.
Never cook meat straight out of the cold. It will seize and never relax. I got into the habit of taking the food out of the fridge as soon as I walked into the kitchen.

The vegetable salsa is as simple as this dish is. Chopped tomatoes, lettuce, red onions and a yogurt sauce. I would place a bottle of your favorite hot sauce (sriracha here) for those who like a kick.

Chicken Shawarma
makes 4 pitas

Spice blend (exactly enough for four thighs but an be easily doubled):
2 teaspoon garlic powder
2 teaspoon ground coriander
2 teaspoon ground cumin
2 teaspoon ground cardamon
1/2 teaspoon cayenne
1 teaspoon smoked paprika
1 teaspoon salt
Black pepper
1/2 lemon slice, wedged
1 tablespoon olive oil (recommend light)
1/4 cup apple juice

Yogurt sauce:
1/2 cup Greek yogurt
1 clove garlic, minced
1 teaspoon tahini
1/4 teaspoon mint
1/4 teaspoon dill
1/4 teaspoon cumin
1 teaspoon honey
Squeeze lemon juice
Salt & pepper

4 pitas, wrapped and warm from the oven
Julienned lettuce
Chopped tomatoes
Sliced red onion
Hot sauce
Yogurt sauce
Guacamole (optional)


1. On a grill or in a cast iron skillet, heat the olive oil and saute the thighs for 5 minutes on each side.
2. Add the apple juice, cover the skillet, lower the heat and steam the chicken until the apple juice thickens.
3. Remove the skillet from the heat and cool. Using 2 forks, shred the chicken from the bones.
4. Pour any juices over the chicken and serve.


recipe-redux-linky-logo

March 19, 2017

Secret Surprise Chocolate Bundt Cake ♥ Baking for Two


I suppose telling you I subscribe to Smitten Kitchen would be tantamount to confessing that I love food.
No surprise there. Actually she was the first blog to introduce me to blogging, way back in 2009.

I recently saw a mention on her blog about this famous chocolate cake made with a secret ingredient (mayonnaise) about the same time as I was just about to open my Cooking for Two cookbook to see if they had a pixie-sized decadent chocolate cake.

Yes, mayonnaise. Don't knock it. I grew up on that cake, it was superior! I had completely forgot about it.
Thanks Deb!!!


I decided to try to marry the mayonnaise part with the ingredient list of the Cooking for Two chocolate cake recipe.
I have to say the first try was pretty darn good, and it disappeared in two days.
I knew I heard a leprechaun, I think his name was Dave!

I love when something comes together quickly since I confess I waited until the last minute.
I wanted to flavor it all with Irish Mist and I wanted it in time for a St.Patty's Day treat.

This recipe makes enough for two small layer cakes or one small 6" bundt. You can get a really nice frosting here that you might want to halve.

If you decide to make the bundt style, you will want a pan that serves 4 (Nordic makes a nice 6 cup sturdy one). I happened to luck out with a clearance sale on an aluminum one but I know you can get one made of silicon. 

Irish Mist Chocolate Bundt Cake 
4 servings


Preheat oven to 350°.

* 1 1/2 ounces unsweetened chocolate, chopped
* 3 tablespoons unsweetened cocoa powder
* 1/4 teaspoon instant espresso pr instant coffee powder
* 1/2 cup Irish Mist (or water), boiling
* 1/4 teaspoon vanilla extract
* 1/2 cup (2 1/2 oz) all-purpose flour
* 1/2 teaspoon baking soda
* 1/8 teaspoon baking powder
* 1/2 cup packed light brown sugar or low sugar baking blend equal to 1/2 cup (mine is 1/4 cup)
* 1 large egg, room temperature
* 1/2 cup mayonnaise

Whipped cream, whipped topping or powdered sugar glaze flavored with Irish Mist.

Prepare the pan with release spray. Place the pan in the center of the oven and bake for 25 minutes for two round cake pans or 30 minutes for a bundt pan.

March 12, 2017

Margherita Frittata ♥ #Sponsored Toufayan Recipe ReDux Challenge


"I received free samples of Toufayan Pita mentioned in this post. By posting this recipe I am entering a recipe contest sponsored by Toufayan Bakeries and am eligible to win prizes associated with the contest. I was not compensated for my time."

I did not grow up eating pita. Growing up there was no pita bread. My Mom was a nutritionist and growing up there was the usual oatmeal or eggs for breakfast, prepared sandwiches to take to school and a well balanced meal for dinner. The one thing that was always on the dinner table was an Italian salad.
Every dinner, every night.

What does a salad have to do with pita bread?
My first exposure to pita was on the job. When you live paycheck to paycheck, you bring your lunch from home but when you can't you buy the only thing you can afford, a basic ice burg/tomato/cucumber salad. Back then that salad came with a free packet of salad dressing and a piece of bread.
One day I spotted a pita in with the breads and before they could realized the mistake, made my salad and stuffed it into the pita. It was an instant hit. Filling, big enough for a substantial amount of salad, light and most of all, affordable.

I think I ate that lunch for the next 4 years.

When this challenge was presented to the Recipe ReDuxers, I loved the idea of creating another healthy dish using pita but a pita recipe for today's advanced palate.


Toufayan Bakeries is a family-owned bakery and get this, they are right here in my home state of New Jersey!
I love that.
They offer a full range of flavored cholesterol free and trans fat free pita breads and chips, bagels, croissants, wraps, flat breads and rolls.

Nowadays, meals often have to be portable, eaten on the go whether at work or at school.
Of course they should be nutritious, affordable and satisfying but updated to fit with the adventurous palates of today.

Tough assignment so I decided to stick close to what I know and am comfortable with, so that means something of Italian origin.
I would make a one dish wonder....a frittata.
Frittata's are quick and easy. All you really need to know is how to beat an egg.

While I could have used the pita as a container for the eggs, I wanted a dish that would fit right at home on a holiday brunch table.

Baked eggs = frittata.
Baked eggs with bread = strata.

Tomatoes, ricotta, herbs = in the Margherita style


From start to finish, 30 minutes. While I used my 8" cast iron skillet (made for two), the recipe was created to serve 4 using a 10" skillet, cast iron or non-stick as long the non-stick is acceptable up to 450°.  Can be successfully doubled to serve 8.

If you are serving a crowd, it can be assembled in a casserole, ahead of time, covered and refrigerated the night before. It should be brought to room temperature then baked for 30 minutes before serving.
Portion off for lunches, microwave 1 1/2 -2 minutes.


Margherita Frittata
makes 4 servings

* 2 tablespoon olive oil
* 6 cloves of garlic, minced
* 1 pita bread (I recommend the sweet onion), cut into 1/2" cubes
* 2 tablespoons tomato ketchup
* 2 teaspoons Italian seasonings
* 6 eggs, beaten
* 1/3 cup Greek-style plain yogurt
* 1/3 cup rated Parmesan cheese
* 1 teaspoon kosher salt
* 1/2 teaspoon black pepper
* 2 teaspoons prepared basil pesto
* 1 tablespoon shopped fresh parsley
* 1 teaspoon fresh tarragon, chopped

* 1/3 cup ricotta cheese

Preheat the oven to 450°.

1. In an ovenproof 10" non-stick skillet, heat the olive oil over medium heat. Add the garlic and saute until you can smell it. Do not brown.
2. While the garlic is cooking, mix the Italian seasonings, the ketchup and the cubed pita in a large bowl. Pour onto a baking pan and toast for 5 minutes. Remove to cool.
3. In the same bowl as you mixed the pita cubes, whisk the eggs with the yogurt until there are no white specks. To the eggs, add the Parmesan cheese, salt, black pepper, pesto, parsley and the tarragon.
4. Pour the egg mixture into the skillet with the garlic and sprinkle the toasted pita evenly over the eggs. Cook on the stove for 2 minutes, or until you see the edges start to set.
5. Remove the skillet from the heat and using a spoon, place six dollops of ricotta evenly spaced and not touching into the egg mixture. Place the skillet into the oven and bake for 12-14 minutes. The eggs should shimmy slightly but not firm. It will continue to cook off heat.
6. Portion and serve.

recipe-redux-linky-logo

February 22, 2017

Asian Inspired Fish Tacos ♥ #Recipe ReDux February Challenge


Taco Tuesday.
Perfect time to make fish tacos.

Since our February #Recipe Redux challenge fell on a Tuesday, they thought it would be a great idea to showcase our favorite taco for Taco Tuesday.

In the summer we fish for local fluke here in New Jersey but in the winter I can get flounder at a good price and it's lean and tender and perfect for tacos.

While most fish tacos use a flavored mayonnaise or sour cream, I like the canned Media Crema and for a change from the traditional Tex-Mex flavors I leaned towards the east with a Chinese touch so I grabbed my Hoisin sauce. I immediately made a batch to mellow in the fridge.
Save the salsa for chips.


Hoisin Crema
makes about 1 cup

* 1/2 cup lite Media Crema (can be found with the sweetened condensed milk or the Tex-Mex products)
* 1/4 cup hoisin sauce
* 2 tablespoons sweet pickle relish
* 1 tablespoon Thai-style Chili Sauce
* 1 1/2 teaspoons lemon juice

Mix everything together and store in the refrigerator for a few hours or up to a week so the flavors blend.


Fried Fish Tacos
makes 4-6

* 2 fish fillets, cut into 12 strips
* 1 egg + 1 teaspoon water
* 1 cup both bread crumbs + panko crumbs mixed together
* 2 cups canola oil
* Creole seasonings
* salt & pepper

1. Whisk egg and water in a bowl.
2. Mix bread crumbs to incorporate.
3. Heat oil in a fry pan until it reaches 350° (or the handle of a wooden spoon dipped into the oil bubbles immediately).
4. Season each side of fish strips with salt, pepper and creole seasonings.
5. Dip fish in egg wash, then into crumbs and then into oil. Repeat with 3-4 strips, being careful not to crowd the pan.
6. Saute on one side until the edges start to brown. Carefully flip over and repeat.
Drain on a paper towel lines sheet pan placed in a warming oven (about 200°) if serving immediately.
7. Repeat until all the strips are fried. Place in a zip bag for up to 4 days.

Toppings:
Shredded lettuce or cabbage, pickled vegetables like carrots, onions, radishes, and jalapenos, hoisin crema or sour cream, avocados, chipotle sauce or salsa.

To serve:
I used a 4" ring to cut each tortilla 3x. I like that in Mexico you get two small tortillas for each taco you order. I also like that it drastically reduces the amount of bread and has portion control. If you are using corn tortilla, they are usually small enough as is.

If reheating - Wrap tortillas in foil and place them in a preheated 350° oven with the fish for 10 minutes.
If serving immediately - do the same as above but only in a 200° oven while the fish is frying.

I like to place some lettuce on the bottom of the tortilla, then place 1-2 strips of fish, some crema, the pickled carrots, radishes or jalapenos and another pinch of lettuce or cabbage. For extra heat, I put out a bottle of Texas Pete. For a spritz of zest, a quartered lime.

These would be perfect as appetizers passed on a platter with a margarita or cold beer, but they were perfect portions for our dinner. I don't know why we don't have these more often. I love that they are light enough to eat two!!

recipe-redux-linky-logo


February 12, 2017

Potato Tortillas ♥ The Potato Performance Challenge #sponsored by Potatoes USA


"By posting this recipe I am entering a recipe contest sponsored by Potatoes USA and am eligible to win prizes associated with the contest. I was not compensated for my time."

Potatoes are one of those foods that have a very bad wrap when it is discussed in the same sentence as diabetes. Because potatoes are known to be a "starchy" vegetable (and quickly break down into sugar), it is believed they should be completely avoided by Diabetics.
That couldn't be further from the truth.

Food science has come a long way since I started blogging years ago. While this blog primarily deals with food and how it relates to diabetes, it also includes updates, either bad or good. In the case of potatoes there is new and good information.
 
The GI of potatoes and other foods depends on many factors, including how they’re cooked and what they’re eaten with and not all varieties have such a high GI. Russet potatoes do (87), for example, but red potatoes (or new potatoes) rank moderately (57).
A meal consisting of lean protein, non-starchy vegetables and a serving of potatoes can be considered well balanced for most diabetics.

Potatoes provide the carbohydrate, potassium, and energy needed to perform at your best, especially if you exercise on a regular basis.
More key facts:
  • The potato is fat-free, cholesterol-free, high in vitamin C, and a good source of vitamin B6 and dietary fiber.
  • An average 5.3 oz potato with the skin contains 45% of the daily value for vitamin C, 620 mg potassium (comparable to bananas, spinach and broccoli), trace amounts of thiamine, riboflavin, folate, magnesium, phosphorous, iron and zinc.  This nutrient power-house contains only 110 calories, no fat or cholesterol, 116 mg of sodium, 24 grams of carbohydrate, 2 grams of fiber and 3 grams of protein.
  • When white potatoes are boiled and cooled to room temperature, they form a resistant starch. This resistant starch feeds the good bacteria, improves insulin sensitivity and the integrity and function of the gut.


The Recipe ReDuxers were challenged to create a recipe featuring the potato, that conforms to a Performance Nutrition Guideline for either Pre or Post workouts.

I created a recipe for potato tortillas that can be eaten either before or after a workout.


The nutrition in one potato tortilla:
Calories: 99
Total Fat: 1g  
Cholesterol: 1.7g
Total Carbohydrates (CHO): 15.8g
Fiber: 1.6g
Sugars: 3.7g
Protein: 5.5g


I love the fact that not only can I eat one of these potato tortillas, I can eat 2 of them and still stay within the guidelines. 

I make a batch on Sunday, count off 6 of them in a plastic zip bag and into the freezer they go.
Monday AM I place one or two of them in the microwave for 1 1/2 minutes and I am off to the races.

If you prefer to eat after your workout like I do, make a healthy Huevos Rancheros.......


.......or Chicken Fajitas.


On the run? Spread a low-fat vegetable cream cheese and canned tuna packed in water or a few slices of roasted chicken breast.
Wrap, roll and go!

Potato Tortillas
makes approximately 25 6-7" tortillas

* 10.5 ounces potatoes ("New" variety for diabetics), peeled and cut into 1 1/2" chunks
* 2 ounces (53g) potato flakes + enough water to weigh 10.5 ounces
* 150g oat flour
* 130g Whole Wheat or All Purpose flour
* 1 1/3 tablespoons salt
* 1/2 cup Romano cheese
* 1/4 cup Egg Beaters Original
* 2 1/2 cans fat-free evaporated milk (850ml)
* Chopped green onions, optional

1. Grate potatoes over a linen dish towel and ring as much water out of them as possible to remove all the starch.
Add grated potatoes, potato flakes with water and rest of ingredients to a large bowl and mix.
2. Grab a non-stick skillet, a release agent and 1/3 cup ladle (for measuring the batter).
Spoon batter into skillet and using the bottom of the ladle, spread batter to approximately 6-7".
3. Cook 3 minutes on one side, flip and cook another 2 minutes.
Cut 12 5" sheets of wax paper and then cut those in half (making squares).
Use one square between each cooked tortilla.

recipe-redux-linky-logo

January 15, 2017

Appetizer Glazed Chicken Meatballs ♥ Sodium Saving, Flavor Raising Recipes with #sponsored Kikkoman


This time of year, a great recipe for party foods is always good to have in your repertoire.
These meatballs are the best I have made to date, and at 30yrs of hosting Super Bowl parties, that says "TOUCHDOWN!!"

"I received a free sample of Kikkoman soy sauce mentioned in this post. By posting this recipe I am entering a recipe contest sponsored by Kikkoman and am eligible to win prizes associated with this contest. I was not compensated for my time."


Easy to make, all the ingredients can be found in your local supermarket plus, by using Kikkoman soy sauce instead of salt reduced the sodium by up to 50% without sacrificing any flavor.
Pump up bland chicken with a marinade featuring Kikkoman Soy Sauce and you will always have a winner.

I took an extra step and coated these meatballs with a soy glaze, also another Kikkoman product.
Could not have been easier and the flavors just popped!!


Along with the regular favorites that Kikkoman produces, they also offer a variety of less sodium products: Less Sodium Soy Sauce, 50% Less Sodium Gluten-Free Tamari Soy Sauce, Less Sodium Teriyaki Marinade & Sauce, and 50% Less Sodium Gluten-Free Teriyaki Marinade & Sauce.

A mouthful in many ways!! Yum..........

Kikkoman has been around for 300 years and a family business to this day. 


Soy sauce is often associated with being high in sodium but it is rich in umami, a savory taste that helps round out the overall flavor of a dish so you are actually using less sodium by adding more flavor to your favorite dishes.

Another win-win in my book.

So the next time you reach for that salt shaker, think about grabbing the bottle instead and make Kikkoman a part of your everyday eats.

Philippine Chicken Meatballs
makes 2 dozen 2" meatballs

For the chicken:
* 6-8 large chicken thighs, boned & skinned (about 2 lbs), or 2 pounds ground chicken
* 1/4 cup Kikkoman soy sauce
* 1 tablespoon ground pepper (yes, 1 tablespoon)
* 2 tablespoons lemon juice
* 5 cloves fresh garlic, minced
* 2 tablespoons brown sugar
* 2 teaspoons salt
* 1 1/2 teaspoons onion powder
* 1/2 teaspoon allspice
* 1 teaspoon ground ginger
* 1 tablespoon rum (optional)
* 1 teaspoon turmeric

For the meatballs:
* 1 cup bread crumbs
* 2 eggs

To finish:
* 1/4 cup Kikkoman Soy Glaze

 Preheat oven to 425°

1. Place all ingredients (up to turmeric) into a large plastic bag and marinate overnight or at least 8 hours.
2. Remove chicken from bag, discard marinade. (If using whole thighs, cut into 1-1/2"chunks and pulse to grind in a food processor).
3. In a large bowl add ground chicken, bread crumbs & eggs. Mix well and form chicken mixture into small balls. Bake for 30-35 minutes on a large sheet pan lined with parchment paper.
Remove and cool.
4. In a large bowl pour the Kikkoman Soy Glaze over the cooled meatballs and stir to coat.

5. Serve on a platter with toothpicks, topped with a slice of pickled jalapeno.

Meatballs can be frozen, sans the glaze in a large zippy bag for up to 3 months.
To eat, heat, toss with the glaze and serve with toothpicks or small appetizer forks.


recipe-redux-linky-logo

January 13, 2017

Cobbled Cookies ♥ Sodium Saving, Flavor Raising Recipes with #sponsored Kikkoman


It is often stated that a good percentage of successful dishes were born out of mistakes.
Such is the tale of these cookies.

"I received a free sample of Kikkoman soy sauce mentioned in this post. By posting this recipe I am entering a recipe contest sponsored by Kikkoman and am eligible to win prizes associated with this contest. I was not compensated for my time."

While creating what I thought would be an excellent recipe using the main protagonist, Kikkoman soy sauce, I ended up with extra leftovers than needed.
The frugal in me simply refuses to loosen it's grip and I did what any good girl would do if she found herself in the same situation....I made cookies out of the remaining dough.
I had no idea how they would turn out.

I thought they were good but I never rely solely on my tongue. To make sure this was something worth repeating, I put the 6 samples on the table, turned my back to clear the dinner dishes and when I sat down again, the cookies were gone!

That pretty much sealed the deal.


Did you know that by making an equal swap of 1/2 tsp of Kikkoman soy sauce for 1/2 tsp table salt, the sodium content of the recipe is cut by 18000mg or 18g?
Confused? I was until I figured the amount of savings to be 1 tablespoon of table salt. That is huge!


You may think soy sauce a strange ingredient to add to a sweet but it is the sodium that elevates all the other flavors making this a perfect blend, plus this batter could not have been easier to work with.
One bowl, one scoop, one shape.....one winner!
Easy to bake, store and eat. No special equipment needed and the dough can keep for up to a week in the refrigerator, 6 months in the deep freeze.


Simply portion off as much as you need.
One recipe makes 4 dozen, I baked off 2 dozen to start.
I will save the last for when the Nudge is back from a business trip.
A nice treat for him.

These cookies are addictive. Perfect for a tea or coffee break. The inside is sightly soft with a crisp exterior.
In this house we are not big on overly sickly sugary sweets.
This is a perfect combination of ingredients.


I imagine these would not suffer one bit if finely chopped nuts made an appearance and wouldn't be upset if instead of a dusting of powdered sugar, they found themselves with a sprinkle of demerara sugar.
Extremely adaptable and easy enough for the kids to help.


I tried a glaze drizzle, thought about dipping them in chocolate, but in the end I went with powdered sugar. Simple is always the best.


Now I think I will make a cup of coffee and dip a few of my new favorite cookies.
Care to join me?


Cobbled Cookies
makes 2 dozen cookies

* 1/4 cup Kikkoman  soy sauce
* 6 tablespoons (3/4 stick) unsalted butter, room temperature
* 2 large eggs
* 2 cups all purpose flour
* 1 1/3 cups sugar
* 1 teaspoon baking powder
* 1 teaspoon cinnamon
* 1/2 teaspoon dried ginger
* 1 cup old fashioned oats

1. Whisk butter, eggs and Kikkoman soy sauce in medium bowl until smooth. (can use an electric beater or stand mixer)
2. In another bowl, combine flour, sugar, baking powder, cinnamon and ginger.
3. Form well in center of flour and add Kikkoman soy sauce mixture.
4. Mix together until smooth and then add the oats. Refrigerate for 30 minutes while you preheat the oven to 350°.
5. Spoon a 1" ball of batter in the palm of your hand and roll like a meatball. Place on a cookie sheet.
Continue to roll enough batter until you reach desired amount of cookies.  Refrigerate the remaining batter for up to 1 week or freeze up to 6 months.
6. Roll each ball into a baton about 3" in length and place on parchment or silpat lined sheet pan leaving 1/2" space between.
7. Bake for 20 minutes. Remove, and when cooled, sift with powdered sugar.


recipe-redux-linky-logo